Restringing a guitar is easier when you slow down and keep each step clean. The main goals are simple: remove the old string safely, seat the new string correctly, wind it neatly, stretch it gently, and tune up gradually.
The core process is straightforward: gather the tools, loosen the strings, remove the bridge pins if your guitar uses them, clean the guitar, order the new strings correctly, wind cleanly, and tune gradually.
What You Need
You can restring a guitar with only the new strings, but a string winder, cutter, tuner, and soft cloth make the job easier.
Useful tools:
- New string set matched to the guitar
- String winder
- Wire cutter
- Tuner
- Soft cloth
- Bridge pin puller for acoustic guitars with bridge pins
Set the guitar on a stable table or bench if you can. Put a towel under the body and support the neck so the guitar does not slide while you work.
Step 1: Loosen The Old String
Turn the tuning key to reduce tension before cutting or removing the string. Do not cut a fully tensioned string.
Beginners can change one string at a time. That keeps the old string path visible and reduces confusion. If you want to clean the fretboard thoroughly, you can remove all strings, but take a moment to notice how the old strings were routed first.
Step 2: Remove And Clean
Remove the string from the bridge and tuning post. Use the moment to wipe dust from the fretboard and bridge area.
On many acoustic guitars, the bridge pin holds the ball end of the string. Pull the pin gently. A string winder often has a small notch for bridge pins, which is usually safer than grabbing hard with pliers or cutters.
On electric guitars, follow the same path the old string used. Some strings load through the back of the guitar, some through a tailpiece, and some through a tremolo block.
Step 3: Anchor The New String
Seat the string at the bridge first. Acoustic bridge pins should hold the ball end securely. Electric bridges vary, so follow the path your old string used.
For acoustic bridge pins, the ball end should sit against the bridge plate inside the guitar, not on the very tip of the bridge pin. After inserting the pin, pull the string gently upward to seat the ball end.
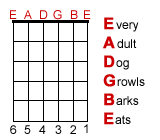
Before winding, confirm the strings are in the right order. The thickest string is the low E. The thinnest string is the high E.
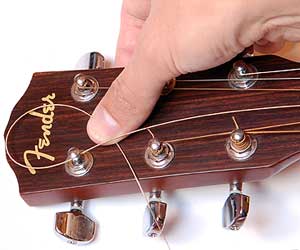
Step 4: Wind Neatly
Pull the string through the tuning post, leave enough slack for a few wraps, then wind so the wraps sit below the hole and do not overlap.
Two to four tidy wraps is usually enough. Too many wraps can slip and make tuning unstable. Crossed wraps can also cause tuning problems. The string should travel cleanly from the nut to the tuning post.
Trim the excess string only after you are confident the string is seated and winding correctly.
Step 5: Tune And Stretch
Tune slowly to pitch. Gently stretch the string along its length, retune, and repeat until tuning settles.
New strings stretch. That is normal. Tune to pitch, pull gently along the string, then tune again. Do not yank hard. You are helping the wraps and anchor points settle, not trying to test the breaking point.
Step 6: Final Check
Play a few open chords and single notes. Listen for slipping, buzzing, or a string that keeps dropping dramatically in pitch. If one string will not settle, check the bridge seating and the wraps at the tuning post.
Common Mistakes
Avoid too many wraps, crossed wraps, trimming too early, or winding the wrong direction around the tuning post. Those mistakes make tuning less stable.
Also avoid mixing up string order. Packages usually label strings by gauge or note name. Lay them out from thickest to thinnest before you begin, especially if you are new to restringing.
If the guitar suddenly feels much harder to play after restringing, check whether you installed a heavier gauge than before. Gauge changes can affect feel and may require a setup adjustment.